
08 Sep January 2018
Willis Sinclair Homes

George (plaid shirt) is playing Red Rover with siblings and cousins.
“The Lowcountry’s Premier Custom Home Builder”
24 Gabriel Road
Lodge, South Carolina 29082
![]()
843 846 2500
Happy New Year!
January 2018
Number 47
 From the desk
of Bill …
It is a new year! We at Willis Sinclair would like to humbly thank all of our clients, contractors and suppliers for making 2017 a successful year for us. We have very much enjoyed working with each of you.
As you may have noticed in my new photo, I am “whiskerless” (for the first time in about 25 years). In January, I am going to have some sort of UV light treatment on my face and neck to help minimize skin cancer recurrence. My dermatologist recommended I shave so the area under my beard could be treated. (My latest incision is visible over my left eye.)
We had an exciting (to me) thing happen in our family. Jessy, our youngest daughter (she updates our website and helps with bookkeeping) is now a member of the Daughters of the American Revolution (DAR)! She qualified because her 6th Great Grandfather, Simeon Burdick was a drummer in George Washington’s army. I am not aware of any other of our family members who have gone through the exercise to qualify.
Little Alice continues to do well. She had her port (a connection on her chest where they could administer medicine without giving her “shots”) removed on the 5th of December. It turns out her body is not making its own cortisone yet. While she was having chemo, the doctors put her on a synthetic cortisone (hydro-cortisone). They weaned her off the hydro-cortisone hoping her body would start producing cortisone by itself. So far, it has not, but the doctor conceded he had used an aggressive schedule to wean her, so he is hopeful she will begin soon. She has weekly checks for the next two months. Her blood sugar has come up where it belongs, so if the cortisone comes up, she will be in really good shape. Thank you all for your prayers for and support of Alice.
We had five of our eight children and eleven of our thirty-three grandchildren with us at Thanksgiving. The weather was beautiful and the grandchildren enjoyed playing outside. When I was wandering around taking photos, I saw a group playing Red Rover. While I watched, one side called for George to come over. George is about 1½ years old. The team that called him had to get down low so he did not just run under their arms.
As I watched, he bounced along the yard – it seemed he went up and down as much as he went forward. Never in his mind did he think he was too little or he could not possibly break the line. I wonder how often we adults see a challenge and just walk away. Not George! He saw the challenge and headed straight for it as hard as he could go with every confidence he would be victorious.
What are you planning to do this new year? This is a good time to give it some thought. Do you need an addition on your house? Maybe a “man cave” over the garage. Perhaps a remodeled and updated living area. We can help with any of those projects. Give us a call. No obligation, of course.
Lighting and electrical thoughts
Back when I was a boy, we moved to an old four room (room, not bedroom) home back in the woods in southeastern Missouri. The “bathroom” (outhouse) was down a path. We had a 15 amp electrical service
Here is the strange thing. For the next fifty or so years, not much changed with electrical systems in homes. Lighting was pretty much incandescent, there were switches and fuse boxes (and some breaker boxes), but it was pretty much like a typical home 40 or so years later.
Today, it seems the electrical design of homes is changing rapidly. We have several types of circuit breakers, a number of types of lighting and many appliances just to mention a few items.
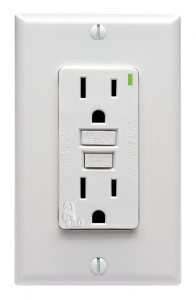
A GFCI outlet has two buttons and maybe a small indicator light or two.
Back thirty or so years ago, GFCI – Ground Fault Circuit Interrupter (sometimes called GFI – Ground Fault Interrupter) outlets came on the scene. They are required in areas that can be wet: kitchen, baths and outside. GFCI outlets have two buttons on them: test and reset. The point of a GFCI outlet is to minimize the chance of electric shock if a device fails. It measures the current that flows out one of the flat prongs of the plug and the amount that flows in the other. Ideally, those two currents should be equal, but opposite (current going in one and out the other). If something happens (a hand held appliance fails) and part of the electrical current gets diverted and flows through a person instead of the return wire, the currents are no longer balanced and the GFCI trips, minimizing the chances of injury.
Arc Fault circuit breakers are now being required by 2011 NEC (National Electric Code) in most rooms of a house. Occasionally, when a device is plugged into a socket, an arc will ignite. It is very dramatic – basically an arc welder. It happened to me one time when I was plugging in an air compressor. An arc occurred and before I could do anything, it had literally burned a prong completely off the plug. Until that point, I had wondered just how important Arc Fault Circuit Interrupters (AFCI) were. When the AFCI detects an arc (it can tell by the current draw), it opens the circuit. The down side is sometimes motors will cause a false trip, although the AFCI devices are getting better and better.
You can probably have your circuit breakers upgraded to GFCI or AFCI if you prefer.
There have been a number of changes in lighting in the past couple of decades. For years, florescent lights were in offices, warehouses and garages. Compact florescent lights (CFL) came on the scene and suddenly, florescent lighting was in many homes. They had one significant drawback. Although it is difficult to break one, if that happened, cleaning it up was a problem. They contain mercury (a heavy metal) and fragments of a broken CFL should not be vacuumed (vacuuming blows mercury everywhere). If you follow a clean up procedure the EPA recommends, they estimate it would cost about $2,000 to clean up a broken CFL.
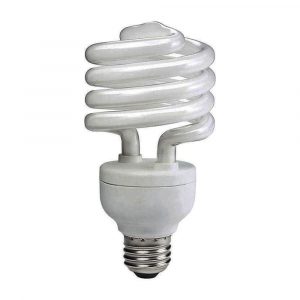
A CFL bulb looks like a spiral.
Just when it looked like CFLs would take over the lighting market, LEDs came along. LEDs are solid state devices. They don’t require the high voltage CFLs need nor do they contain mercury that is dangerous to inhale. Initially LEDs were expensive, but now the price is coming down.
Both CFLs and LEDs reduce the energy used for lighting and that is a double win. Any power that is converted to heat (about 80% in the case of incandescents) also causes the air conditioner to work harder to keep the room cool.
Low Voltage lighting has also gotten more popular. One decorator a home owner was using was convinced low voltage lighting meant low power consumption. It does not. Every time voltage is changed (from 120 volts to 12 volts, for example), there are losses which means efficiency goes down, not up.
What is the point of low voltage lighting if it is not to save power? As far as I can see, the advantage to low voltage lighting is that if a wire is damaged, the danger of an electrical shock is minimal. That is why it is used for yard lighting or lighting a bookcase where the wire might be run behind a stile or under a shelf. The NEC (National Electric Code) does not apply to circuits with voltages below 50 volts, so wiring does not have to be in boxes or behind walls.
Another electrical device that has gotten popular in homes is a ceiling fan. A ceiling fan moves air and makes the room feel comfortable if it is a few degrees higher than would be comfortable without the fan. This means the air conditioner temperature can be increased, saving money.
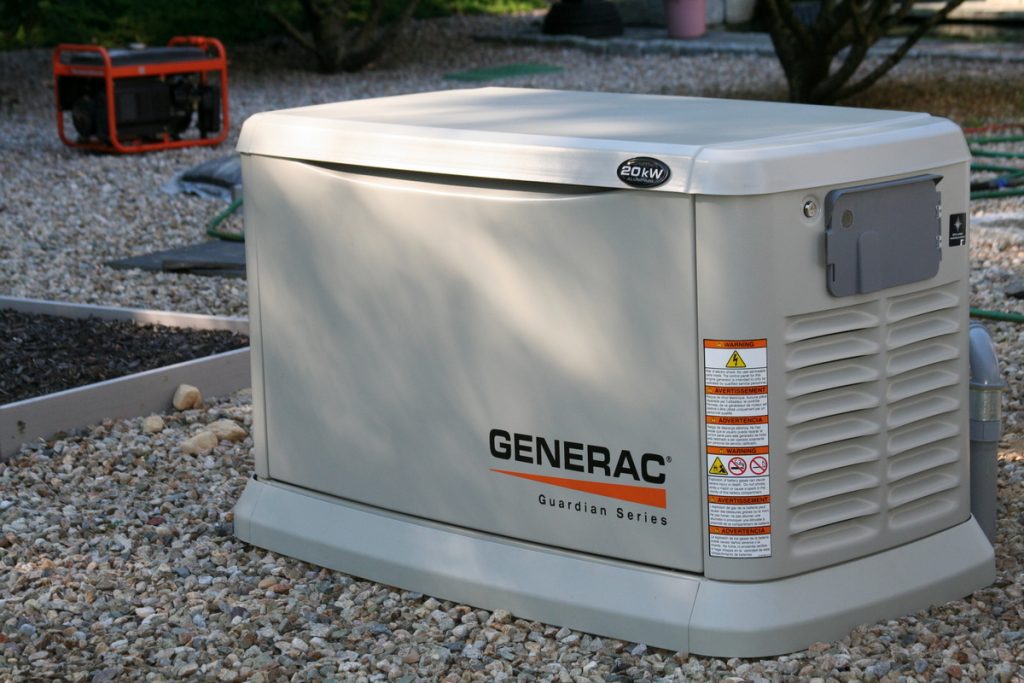
A typical whole house generator.
Probably the most popular “new” electrical device today is the whole house generator. In areas where power outages are a real possibility (due to hurricanes, trees on power lines or other events), a back up generator can be a very good choice.
Sometimes a generator will not power an entire house, but there are circuits which will shed (turn off) non essential loads so it can supply important loads (like a well water pump, air conditioners, refrigerators and such). Keep in mind, staying comfortable is not the only reason for a whole house generator. Keeping your home humidity down to prevent the growth of mold and mildew is very important. While using generator power is much more expensive than from the power company, if the power is down, it is important to keep your home conditioned.
Willis Sinclair Homes
We solve problems!
Call Us
![]()
843 846 2500
No Comments